Friday, December 6, 2013

Semolina cake (rawa cake)

Rawa cake

I have many childhood memories associated with this cake. My mom and grandmother used to make this delicious cake. Reason I liked this cake is because it had all good and healthy ingredients. Rawa (Semolina), very less shuddha desi ghee (butter made from cow's milk), milk thats it, only these ingredients were used to produce this beautiful aromatic cake.

Ingredients:
1 cup rawa (semolina)
1/2 cup powdered sugar
1 cup milk (you may require less)
1/4 cup ghee (butter)
1 tsp baking powder or soda
Pinch of salt

How to do it:
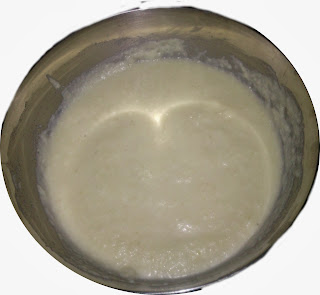
Beat ghee ans sugar together and make a nice paste of it, start adding rawa (semolina) to mixture. Keep mixing till all rawa (semolina) is incorporated. Start adding milk little at a time and keep mixing. You can add any flavor if you wish, but trust me a natural flavor of ghee and rawa (semolina) are simply best. We are looking to make mixture more like a slurry so don't add too much milk. Now add a pinch of salt and baking powder/soda in mixture. Give it a nice stir, cover and keep aside for about 2 hours.

This is how mixture looks like

 After 2 hours check mixture, rawa (semolina) have socked in milk and may have absorbed it, if you see mixture has become little think then add some more milk to make it to pouring consistency. Your dough is ready. You can cook it under pressure cooker (make sure to remove whistle and rubber gasket) or over fry pan/tawa (skillet), just make sure cake tin should never come in direct contact with either pressure cooker, fry pan or tawa (skillet). You can use sand as a medium to heat transfer from fry pan/tawa (skillet). Bake cake in greased tin for about 20-30 minutes.

Look at gorgeous golden brown cake 

If you have oven then just pre-heat to 180 degree Celsius (360 Fahrenheit) and bake for about 20-30 minutes. Cake is considered ready once its top becomes golden brown. I prefer to use cake pin to make sure cake is baked evenly. This cake does not rise much so don't worry :)

This recipe belongs to my mother, many many thanks to her for everything :)


Its done, nice soft and aromatic

Wednesday, December 4, 2013

Stuffed chicken with mushroom sauce and saffron rice

I always use to wonder if we can make stuff chicken with veggies or any other stuff and eat it, and I did after watching few recipes on youtube and decided to make one for me :) I had some leftover mushrooms and cream. So I decided to make stuffed chicken with mushroom sauce and saffron rice. Why saffron rice? because I like its flavor :) Saffron rice looks amazing and its aroma takes you to another level.

This Preparation is enough for 1-2 people, Once you start eating it, its pretty hard to stop yourself :) so divide portion before you serve :D. We shall first prepare chicken breast and then start preparing sauce. We are going to sear of chicken breast from both side till its golden brown and then finish it in sauce to get mingled with flavor on mushroom and cream. You can choose any filling for stuffing, feel free to experiment, I used whatever was available in my kitchen as I hate to go out and get stuff :)

Ingredients for stuffing:
1 chicken breast
1 mid sized Tomato cut in thin stripes  (discard seeds and pulp)
1/2 cup grated cheese
small bunch of coriander leafs, just crumble them with hands no need to chop finely
1/2 tbsp red chilly powder
1/2 tbsp garam masala powder
salt and pepper to taste

Ingredients for sauce
1 medium onion finely chopped
1 tbsp ginger-garlic paste
100 gms of chopped mushrooms (mushroom of your choice)
60 ml white wine
100 ml cream
small bunch of coriander leafs finely chopped
salt and pepper to taste
oregano or other spices as per your taste.

How to prepare chicken breasts for stuffing:
This is bit tricky part as you must be able to cut breast very cleanly in order to fill it up with stuffing.
Hold chicken breast with thick comes under your right hand's thumb, carefully insert sharp knife in thickest part, as mush deep as you can. Just make sure not to go much deep as it may cut through creating mess. Now run knife back and forth in chicken breast and side to side, this way a pocket will be created in chicken breast. Take out knife and make sure enough room is created by inserting 2 fingers in pocket. You are done with creating pocket, keep it aside till we prepare filling.

Prepare filling and chicken breast: 
Take a mixing bowl and mix together all ingredients, add little bit oil as well. this is our stuffing. Start stuffing chicken breast with this mixture, push in with fingers. Make sure mixture is packed and have reached till end of pocket. Seal of pocket by toothpicks so that mixture won't fall out. Get chicken breast seasoned with little oil, salt and pepper on both side.
Heat up frying pan over medium heat and sear off chicken breast for 4-5 minutes on each side till it becomes golden brown. Take breast out of pan and wrap it in aluminium foil, we are going to use same pan for making sauce so preserve all juices as is.

Golden browned chicken breast


Making mushroom sauce:
Use same pan and add little bit oil, saute ginger garlic paste till its becomes aromatic. Add in chopped onions and saute till they are translucent. Add chopped mushrooms and saute them along with onions. Now add chopped coriander leafs and saute a little, now add white wine to pan and saute together on low to medium heat. Saute till wine is reduced to half, now add cream and give a nice stir to all mixture, so that cream shall mix well with entire mixture. Add in spices, pepper and salt.

This is how stuffed chicken looks like

Putting all together:
Once sauce is prepared reduce heat to low and add in stuffed chicken breast to sauce. Keep lid on and cook till sauce is reduced to half or chicken is done. Make sure to turn chicken to side after 10 mins of so for even cooking. Some prefer to cook rest of the chicken directly in pre-heated oven as well, I prefer to cook in same pan with lid on. If sauce is not reduced and chicken is cooked, turn to high flame and take lid off so that sauce will get thicken faster. To avoid over cooking chicken, just take it out.

Finished dish

Plating:
Cut chicken breast (tilted cuts) carefully while its still hot, and arrange them on top of pile of rice. Pour in mushroom sauce a bit on chicken and pour rest in the plate. Enjoy :)


Rum balls

I really love liquor filled rum balls as they just melts in your mouth. Once you pop them in, they melt slowly while releasing beautiful liquor gently :) and that's the best part.

Enough said...I tried them a month back however posting recipe now. Recipe not belong to me, I must thank to Stephanie from joyofbaking dot com who shared this recipe over internet. She is my online teacher :)
I have modified some part of original recipe to suit my needs and ingredients


Ingredients:

150 gms mixed toasted nuts (almonds, cashews, unsalted pistachios, walnut etc, take whatever you wish)
4 cup cakes small or left over cake, or cookies (125 gms), I prefer cake as it melts in mouth easily
50 gms of powdered sugar
2 tbsp honey
60ml red rum (or liquor of your choice)

Finished Rum balls 


How to do it:

Chop toasted nuts very finely (you don't want to powder them, just chop as fine as possible).
In a mixing bowl add chopped nuts along with sugar and honey and give a nice mix.
Crumble in cup cakes (mini muffins) by hands, just make sure you make finer crumb.
Now add rum or any liquor in mixture and keep mixing until everything is mixed well and
mixtures starts to hold up. If mixture is not holding up then add more cake crumbs.
Chill mixture in refrigerator for couple of hours, then take it out and start rolling out small balls, once this done store them back in fridge.
Rum balls are ready now, you can make a chocolate coat or powdered sugar coating to these balls, as per your choice just dip these balls in melted chocolate, or roll in powdered sugar or roll them in chopped nuts etc. Its time to become more creative at this stage. Enjoy your melting rum balls after one day, so that liquor will get mingled well and produces excellent taste.


Thursday, November 7, 2013

Stir fried chicken sausage and tortilla chips, with cheese cream sauce

I love chicken sausages as they have nice smokey flavor. But best part is they can be cooked pretty fast with less efforts. I love to eat sausages loaded with spices and along with cream cheese sauce, a combo of two different tastes blends very well.

Ok enough writing, here is how to cook this simple recipe.

Ingredients:
- chicken sausages (2-3) cut in about half inch thickness
- 1tsp Gigner-Garlic paste
- 2 tbsp finely chopped onion
- chilly flakes
- Mediterranean mix spices
- salt and black pepper for taste

For sauce:
- 150ml milk
- 1tsp all purpose flour
- 1 cup grated cheese
- 1 tsp butter
- 1 tsp oregano

How to put everything together.
- Heat a pan on medium heat and saute ginger-garlic paste, add finely chopped onions till they turn bit pink.
- Add sausage pieces and saute them till they appear golden brown.
- Add in spice mix, salt, pepper and chilly flakes
- Toss nicely and turn off heat, keep lid on.

Sauce:
- Add a butter to sauce pan over medium heat
- Add 1tsp all purpose flour and whisk with butter, make sure no lumps left and mixture does not turn brown.
- Add up milk and give it a nice stir
- Once milk starts to bubble stir in cheese until it melts completely and prepare a creamy sauce.
- Add in some oregano and we are done.

Take out sausages on plate, pour in creamy sauce and serve with some spicy tortilla chips.
It should look something like this


Friday, August 2, 2013

Quiche

I first tasted quiche during outing and I really liked its creamy and cheesy richness, so I decided to give it shot at home :) So here is my version for the same.

Quiche is a savoury, open-faced pastry crust with a filling of savoury custard with cheese, vegetables or meat.
practically you can fill anything in it :) and that's the beauty of quiche. I had put veggies in quiche and here is how I made it.
Ingredients:
1. Pie crust (refer to http://vinitsjoyofcooking.blogspot.in/2013/08/pie-crust.html)
2. 1/2 cup grated cheese
3. 120 ml heavy cream
4. 120 ml milk
5. 1 egg + 1 (yolk)
6. salt, pepper, spices, herbs for taste (your call)
7. Half onion in thin strips
8. Half capsicum in thin stripes
9. Half tomato (remove stem and seeds) in thin stripes
10. 1 tsp oil (any cooking oil shall do)


Method:
In a skillet/pan heat 1 tsp oil and sauté onions, tomatoes and capsicum until they are done, turn heat off and set it aside to let it rest to room temperature 

Now mix in 1 egg + 1 yolk and whisk together.
Add in grated cheese, cream and milk and keep whisking. If you want your quiche to be very creamy then replace milk with cream or vice versa, if you want it more cheesy then reduce cream a little and add extra cheese. You can play with it as you like. Key thing is quiche should be creamy thats all :)
Add in salt, pepper any other hrebs/spices as per your wish. Cheese already has some salt contents so you may need to keep eye on how much salt you are adding in :)
Now add sautéed veggies to this mixture and give it a nice mix.

Baked quiche

Make sure you have aligned pie crust in baking teen and oven is pre-heated to 180 degree Celsius.
Pour mixture over pie crust in tin and make sure it does not spill over edges of tin.
Bake this upto 10-15 minutes and check for firmness, and then cook for 10-15 minutes more or till quiche starts browning. Your quiche is ready, it may appear little bit wobbly but its fine, thats how it should appear :). you can serve it right away.

A nice quiche piece

Pie crust

A beautiful Pie crust is essential for pies (ofcourse :) ), tarts, quiche and many more. So here is how I made pie crust for my preparations. This makes crust for about 6-7 inch tin.

Ingredients:
1. 100 gms all purpose flour (maida)
2. 40 gms unsalted plain butter (I use fat free butter)
3. 10 gms shortening ( लोणी (loni) , मक्खन (makkhan)
4. 1-2 tsp. cold water
5. 1/4 tsp salt
6. 1 Egg white 


Method:
For a good pie crust, butter and shortening must be cold, so keep it in refrigerator until you gather all required ingredients. 
First put all purpose flour and salt in whisking bowl and give a little whisk to mix them well (I use small mixy)
Now cut butter in small cubes and mix in above mixture, now blend them together in pulsating action,
we don't need to keep it spinning in mixy. Dough should like coarse not fine paste.
Now add shortening to mixture and again blend together in pulsating action.
Now add 1 tsp water into mixture and give little spin, please note that we don't want to make dough in a fine paste, we just need enough water so that mixture will hold together when pressed by hands. Add more water if needed. As per my experience you need total 1 and 1/2 tsp water only, but it can change depending on flour you use. 
Press mixture by hand to make sure it holds, if it does then its done.
Now kneed mixture into small ball and then press it round shape, cover with plastic/aluminium and refrigerate it for about 30 minutes.

Now we are ready to roll out and bake our pie crust.
Take out dough from refrigerator and put it on flat surface. Use more flour so that dough won't stick to surface. Now rollout dough neatly in round shape, just a inch more than diameter of your baking tin. Use more flour to prevent dough from sticking to surface.
Make sure to lightly grease your baking tin by either dusting with flour or 
Now carefully lift rolled out dough on rolling pin and carefully place on your baking tin and with lightly pressed it against tin. Put this in refrigerator untill oven is preheated. 
Pre-heat oven to 200 degree Celsius, once oven reaches to this temperature; take out baking tin from refrigerator and put on flat surface. Gently puncture pie using fork as we don't want pie crust to rise once it starts baking.
Put a slightly greased parchment/butter pepper on tin and fill it with pie weights (beans/rice/washed sand (dry)), so that pie crust won't rise as it bakes and retain its shape and does not sogg down from tin's edge.
Put tin in oven and bake it for about 10 minutes or till edges of pastry start browning. 
Remove from oven and remove parchment/butter paper and pie weights.
Reduce oven temperature to 180 degree Celsius and bake for 5-10 minutes more, pie crust should be ready now.
I prefer to brush pie crust with egg white, so that egg whites seals any cavity/punctures/holes in pie crust. This helps pie crust to go soggy when we pour pie mixture in it later. If you apply egg whites then bake it for another 2-3 minutes so that it shall seal pie crust properly.

Our pie crust is ready, you can use it once its cooled down. You can refrigerate it for 2-3 days or keep it frozen as well. Make sure you covered in properly before refrigerating it.


Thursday, December 20, 2012

Home made Barbecue sauce

        When I started grilling on my charcoal grill, I realized that I need to get hold of some BBQ sauce.
I visited few superstores and found out that all BBQ sauce were pretty costly. For a casual griller like me such huge price was overhead. So I decided to make BBQ sauce myself. I went ahead searched on web, youtube and various food blogs and finally decide to mix 2-3 recipes to make one for me :) Basically its a mix of many sauces put together. I made one using tomato sauce as base sauce. So here is list of ingredients that I used. These ingredients shall yield about 300-400ml of sauce.

Things we need:
- 8 Big red Tomatoes
- 1/2 cup tomato ketchup (I used plain one)
- 1/2 cup vinegar
- 1/2 cup soya sauce
- 1/2 molasses
- 1/4 cup chilly sauce (you can have 1/2 cup if you need more hot version)
- 1/2 cup finely chopped onion
- 2 green chillies finely chopped
- 8 cloves of garlic finely chopped
- 1" ginger finely chopped
- 1 tsp tamrind paste
- Sugar as per taste
- Salt as per taste
- 1 tsp vegetable oil

How to do it:
Peel  and de-seed tomatoes and make nice smooth purée.
- Take heavy bottom pan and heat oil in it
- Sauté onion till they become transparent (don't let them brown)
- Add finely ginger, garlic and chillies and sauté well with onions.
- Then add Tomato puree and stir well and cook it.
- Add tomato ketchup and chilly sauce and stir well
- Then add soya sauce and molasses
- Add in tamrind paste, salt and vinegar and cook for about 3-5 minutes
- Now you will need to balance taste of sauce by adding sugar/chilly powder as per your taste.
- Well that's it its just mixture of sauce, let it cool and fill it in dry jars and refrigerate for storage.